PV Mid Clamp: Universal Solar Panel Mounting Solution with Advanced Grounding Technology

Get a Free Quote

Our representative will contact you soon.
Email
Name
Company Name
Message
0/1000

pv mid clamp

The PV mid clamp is a crucial component in solar panel mounting systems, designed to securely fasten adjacent solar modules in photovoltaic installations. This essential hardware piece creates a reliable connection point between two solar panels while maintaining proper spacing and alignment. Engineered with high-grade aluminum and stainless steel materials, these clamps ensure long-term durability and resistance to environmental factors. The mid clamp's innovative design features a universal fit mechanism that accommodates various solar panel frame thicknesses, typically ranging from 30mm to 40mm. Its pre-assembled structure significantly reduces installation time while maintaining optimal pressure distribution across the panel frames. The clamp incorporates advanced grounding technology, eliminating the need for separate grounding components and ensuring electrical continuity throughout the array. Its ergonomic design allows for quick snap-in installation, while the integrated spring mechanism ensures consistent clamping force over time. The product's versatility makes it suitable for both residential and commercial solar installations, compatible with most mounting rail systems available in the market.

New Product Releases

The PV mid clamp offers numerous advantages that make it an indispensable component in solar panel installations. First, its universal compatibility feature eliminates the need for multiple clamp sizes, streamlining inventory management and reducing installation complexity. The pre-assembled design significantly cuts down installation time by up to 50% compared to traditional clamps, resulting in substantial labor cost savings. The clamp's innovative spring mechanism maintains consistent pressure throughout temperature fluctuations, preventing panel movement and potential damage. Its integrated grounding capability eliminates the need for separate grounding components, reducing both material costs and installation steps. The high-quality aluminum construction ensures exceptional durability while keeping the overall system weight low, making it easier to handle during installation. The clamp's design also includes anti-theft features, providing additional security for outdoor installations. Its weather-resistant properties, including corrosion resistance and UV stability, guarantee long-term performance even in harsh environmental conditions. The product's adjustable height feature accommodates different panel frame thicknesses, making it versatile across various panel brands and models. The ergonomic design allows for single-handed installation, improving worker efficiency and safety on the job site. Additionally, the clamp's uniform pressure distribution helps maintain panel integrity and optimize system performance over time.

Tips And Tricks

What are the maintenance requirements for an aluminum carport, and how can I keep it looking its best?

06

Jan

What are the maintenance requirements for an aluminum carport, and how can I keep it looking its best?

Your aluminum carport needs regular care to stay strong and last for years. Dirt, debris, and weather can weaken its structure over time. Cleaning and inspecting it often helps you catch problems early. Following proper maintenance requirements protects your investment and keeps your carport looking great. A little effort now prevents costly repairs later.

Cleaning Maintenance Requirements

Importance of Regular Cleaning

Keeping your aluminum carport clean is essential for its longevity. Dirt, leaves, and debris can accumulate on the surface and lead to stains or damage. Regular cleaning prevents these issues and keeps your carport looking new. It also helps you spot potential problems early, such as scratches or corrosion. A clean carport not only enhances its appearance but also ensures it remains functional for years.

Step-by-Step Cleaning Guide

  1. Remove debris: Use a broom or brush to sweep away leaves, dirt, and other debris from the roof and sides.
  2. Rinse the surface: Spray the carport with a garden hose to remove loose dirt.
  3. Prepare cleaning solution: Mix warm water with a small amount of mild detergent in a bucket.
  4. Scrub gently: Dip a sponge or cloth into the solution and scrub the aluminum surface. Focus on areas with stains or buildup.
  5. Rinse thoroughly: Use the hose to rinse off all soap residue. Leftover soap can cause streaks or attract more dirt.
  6. Dry the surface: Wipe the carport with a microfiber cloth to prevent water spots.

Weatherproofing Your Aluminum Carport

Applying Protective Coatings

Protective coatings shield your aluminum carport from harsh weather conditions. These coatings create a barrier that prevents moisture from seeping into the surface. You can use a clear sealant designed for aluminum to enhance its durability. Apply the sealant evenly across the carport using a paintbrush or roller. Focus on areas that are more exposed to rain or snow. Let the coating dry completely before exposing it to the elements. Reapply the coating every year to maintain its effectiveness. This simple step ensures your carport stays strong and weather-resistant.

Managing Snow, Ice, and Rain

Heavy snow, ice, and rain can strain your carport’s structure. Remove snow from the roof promptly to prevent excess weight from causing damage. Use a soft snow rake to avoid scratching the aluminum surface. For ice, avoid using sharp tools that could leave marks. Instead, apply a de-icing solution that is safe for aluminum. During rainy seasons, check the drainage around your carport. Ensure water flows away from the foundation to prevent pooling. Regular attention to these weather challenges keeps your carport in excellent condition.

Preventing UV Damage

Prolonged exposure to sunlight can fade and weaken your carport. To protect it, consider installing a UV-resistant coating. This coating reflects harmful rays and reduces heat absorption. You can also add a shade or tarp over the carport during peak summer months. Inspect the surface regularly for signs of fading or discoloration. Addressing UV damage early helps preserve the carport’s appearance and structural integrity.

Preventing Corrosion and Rust

Aluminum's Resistance to Rust

Aluminum naturally resists rust, unlike other metals. This is because it forms a protective oxide layer when exposed to air. This layer prevents moisture and oxygen from causing damage. However, aluminum is not entirely immune to corrosion. Environmental factors, such as saltwater or acidic rain, can weaken this protective barrier. Regular care ensures your carport stays corrosion-free.

Identifying Early Signs of Corrosion

Spotting corrosion early helps you prevent further damage. Look for discoloration, such as white or gray powdery spots, on the aluminum surface. These spots indicate oxidation, which can lead to structural weakening if ignored. Check areas where water tends to collect, like joints or corners. Also, inspect for scratches or dents, as these can expose the metal to moisture. Regular inspections allow you to address issues before they escalate.

Using Anti-Corrosion Products Effectively

Anti-corrosion products protect your aluminum carport from environmental damage. Choose a product specifically designed for aluminum surfaces. Apply it evenly across the carport, focusing on vulnerable areas like joints and edges. Clean the surface thoroughly before application to ensure the product adheres properly. Reapply the product as recommended by the manufacturer. Combining this step with other maintenance requirements keeps your carport in excellent condition for years.


Regular maintenance keeps your aluminum carport strong, functional, and visually appealing. By cleaning, inspecting, and weatherproofing it, you protect your investment and avoid costly repairs. A little effort now saves you time later. Follow these tips to ensure your carport stays in excellent condition for years.

View More
What is the cost of a steel carport installation?

17

Feb

What is the cost of a steel carport installation?

Introduction to Steel Carport Installation Costs

Steel carports have become a popular choice for vehicle protection due to their durability and versatility, aligning with recent trends in home improvement and outdoor structures. Consumers are increasingly turning to steel carports for a reliable and long-lasting solution to protect their vehicles from the elements. However, understanding the cost of steel carport installation is crucial for effectively budgeting such projects. Installation costs can vary widely based on a range of factors, including geographic location, the complexity of the design, and customization options. By exploring these costs, potential buyers can make informed decisions that align with their budgets and needs while ensuring their vehicles remain shielded year-round.

Cost Breakdown of Steel Carport Installation

Understanding the cost breakdown of steel carport installation is crucial for effective budgeting. Material costs form a significant portion of the overall expense. The price of steel, the primary material, usually ranges from $3 to $5 per square foot. Additional materials like roofing and siding contribute to the overall cost. According to industry statistics, roofing materials can add another $2,000 to $4,000 for an average-sized carport, while siding might range from $10 to $15 per square foot. These figures can vary based on quality and design preferences, but they provide a solid starting point for cost estimation.

Labor and installation fees are another major component of the total cost and can vary significantly depending on several factors. Geographical location plays a huge role, as labor rates differ from one region to another. Furthermore, the complexity of the design affects the installation cost. Below is an ordered list of average labor and installation cost ranges to consider:

1. Simple installations: $1,000 to $3,000

2. Moderately complex installations: $3,000 to $5,500

3. Complex installations involving custom designs: $5,500 and above

Apart from material and labor costs, additional expenses such as transportation and taxes might increase the total project cost. For instance, transporting materials from the supplier to the installation site can add 5-10% to the total material costs, depending on the distance and method of transport. Taxes, often overlooked, will also contribute to the final budget and can vary depending on the state regulations regarding construction projects. Understanding these potential expenses is vital for setting a realistic budget for a steel carport installation. By acknowledging all these costs, homeowners can plan better and avoid any financial surprises during their project.

Understanding Additional Expenses

When planning the installation of a steel carport, site preparation expenses are a crucial factor to consider. These can include grading, leveling, and any necessary clearing of the site to ensure a proper foundation. The complexity of the site can significantly influence these costs, often requiring professional evaluation to assess the terrain and drainage requirements. Proper site preparation is essential to ensure the carport's structural integrity and longevity.

Additionally, obtaining permits is a vital step that can incur extra costs, often varying based on local regulations. It's essential to research and comply with local zoning laws and building codes, which can differ widely depending on location. This process may involve fees for permit applications and inspections, adding to the overall expense of the carport installation. Failing to secure the necessary permits can result in legal complications or increased costs down the line.

Moreover, optional features can enhance the functionality and value of your steel carport, although they come with additional expenses. Features such as insulation, custom dimensions, or specialized roofing materials can improve the carport's utility and aesthetic appeal. While these additions may raise the initial installation cost, they often provide long-term benefits in terms of energy efficiency and increased property value, making them a worthy consideration for many buyers.

Cost-Effective Tips for Steel Carport Installation

When planning a steel carport installation, employing cost-effective strategies can make a significant difference in the overall budget. One practical approach is to schedule the installation during off-peak seasons, when contractors might offer discounts due to reduced demand. Additionally, considering a DIY option for simpler designs can save on labor costs, provided you have the necessary skills and tools.

Selecting the right size and design of your steel carport is crucial for balancing costs with intended use. Consider creating a list of common sizes and their typical expenses to align your choice with your financial plan. For instance, smaller carports may suit a budget-conscious consumer, while those requiring specific features might opt for larger, custom dimensions.

Another money-saving tip is to compare quotes from multiple contractors before making a decision. Each contractor may offer different rates and packages, and obtaining detailed estimates enables informed decision-making. By doing so, buyers can ensure they are receiving the best possible deal, ultimately lowering the financial burden of the installation.

Conclusion: Understanding the Full Cost for Budgeting

Awareness of all costs involved in installing a steel carport is crucial for effective budgeting. When buyers plan and budget carefully, they can transform their purchase into a valuable long-term investment that enhances functionality and boosts property value. Be proactive in understanding the various aspects of installation costs to avoid surprises and ensure your investment pays off.

FAQ

What factors affect the cost of steel carport installation?

Several factors can influence the cost, including material prices, labor rates, geographical location, and the complexity of the carport design.

How much do roofing materials contribute to the overall cost?

Roofing materials can add approximately $2,000 to $4,000 to the cost of an average-sized carport.

Are there any additional expenses to consider beyond material and labor?

Yes, other expenses may include transportation fees, taxes, site preparation, permits, and optional features such as insulation or custom dimensions.

What are some cost-effective tips for installing a steel carport?

Scheduling during off-peak seasons, considering a DIY approach for simpler designs, and comparing contractor quotes can help reduce costs.

View More
What factors should be considered when choosing a solar roof mounting system for residential use?

17

Mar

What factors should be considered when choosing a solar roof mounting system for residential use?

Introduction: Importance of Choosing the Right Solar Roof Mounting System

In this expanding era of renewable energy, selecting the proper solar roof mounting system is pivotal for optimizing solar installations. It guarantees that solar panels are not only positioned effectively for maximum sun exposure but also ensures the longevity and efficiency of the roofing system itself. Understanding its crucial role, homeowners and businesses alike are increasingly focusing on choosing the optimal mounting solution.

Key role in energy efficiency and roof longevity

The correct solar roof mounting system plays a significant role in maximizing energy production by ensuring solar panels are ideally positioned for optimal sun exposure. Appropriate mounting systems contribute to roof longevity by distributing the weight evenly, reducing stress on roofing materials, and preventing potential damage over time. Industry studies underscore that efficient mounting systems can enhance energy efficiency substantially, ensuring a robust setup that potentially extends the lifespan of both the solar panels and roof. Robust mounting solutions ensure that your investment in solar energy pays off long-term by bolstering the durability of your panels and roof.

Impact on long-term savings and environmental benefits

An effective solar installation can lead to significant financial savings due to reduced energy bills, proving the long-term impact of a proper solar roof mounting system. Additionally, it offers substantial environmental benefits by enhancing solar energy harvesting, which in turn reduces carbon footprints. Studies have shown that homes equipped with efficient solar installations can experience notable savings and an impressive return on investment (ROI) over time. Expert opinions highlight that proper mounting systems are indispensable for enhancing the sustainability of residential energy solutions, paving the way for a greener future while safeguarding financial interests. By choosing the right solar roof mounting system, you not only ensure energy efficiency but also contribute positively to the environment and long-term savings.

Roof Type and Structural Compatibility

Evaluating Roof Materials (Asphalt, Tile, Metal, Flat Roofs)

Choosing the right solar roof mounting system begins with understanding the different roof materials as each requires a specific installation approach. Asphalt shingles, being the most common material, are easy to penetrate but require careful sealing to avoid leaks. Tile roofing requires mounting systems designed to avoid cracking tiles during installation. Metal roofs use clamps rather than penetrations, which is advantageous for maintaining roof integrity. Flat roofs often employ ballasted mounts that do not require drilling, thus protecting the roof membrane. Each material’s unique characteristics determine the appropriate solar roof mounting system ensuring efficient energy capture without compromising roofing integrity.

Assessing Load-Bearing Capacity and Structural Integrity

Before installing solar panels, it's crucial to assess the load-bearing capacity and structural integrity of the roof. Solar roof mounting systems introduce additional weight, and improper assessment may lead to structural failure. The recommendations of structural engineers should be sought for insights into safe load limits. For instance, flat roofs might require reinforcement to safely support panel weight and withstand environmental loads like snow or wind. Ensuring the roof’s integrity not only supports the mounting system securely but also prolongs the lifespan of both the roofing and the solar installation itself.

Mounting System Durability and Weather Resistance

Material Choices: Aluminum vs. Stainless Steel

Choosing the right material for solar mounting systems is essential for durability and efficiency. Aluminum and stainless steel are the two primary materials used, each with its advantages. Aluminum is lightweight and cost-effective, which makes it an economical choice for many installations. However, it may not offer the same level of durability as stainless steel in harsh weather conditions. On the other hand, stainless steel boasts superior corrosion resistance and longevity, making it ideal for areas prone to extreme weather. While more expensive, its robustness can justify the cost in the long run. Experts suggest that material selection should also consider local climate, advising stainless steel for coastal or high-humidity areas to prevent corrosion.

Resistance to Wind, Snow, and Seismic Factors

Designing solar mounting systems to withstand environmental pressures is crucial for safety and longevity. Systems must cope with extreme weather conditions such as high wind speeds and heavy snow loads. For instance, solar installations can face wind speeds above 110 miles per hour and snow loads exceeding 30 pounds per square foot in some regions. Additionally, seismic considerations are vital in earthquake-prone areas. Adhering to local building codes and standards helps ensure structural resistance and safeguards investments. The International Building Code (IBC) provides guidelines that emphasize these aspects, ensuring installations remain secure under various environmental stressors.

Installation Process and Maintenance Requirements

Ballasted vs. Penetrating Mounting Systems

When considering solar panel installations, understanding the difference between ballasted and penetrating mounting systems is crucial. Ballasted mounting systems hold panels in place using weights, making them ideal for flat or slightly sloped roofs where penetration is undesirable. They are particularly useful in commercial settings where roof integrity must remain intact. Conversely, penetrating mounting systems require drilling into the roof to secure mounts with bolts or screws, offering a more permanent solution suitable for various roof types that can support such installations. Each method has its advantages and disadvantages; ballasted systems are easier to install but may be limited by weight constraints, while penetrating systems provide stronger holds but can affect roof integrity. Selecting the right system involves considering roof type, environmental factors, and local regulations to ensure compliance and optimal performance.

Professional Installer Qualifications and Certifications

Securing qualified and certified installers is paramount to ensuring the successful implementation of solar roof mounting systems. Professional credentials, such as the North American Board of Certified Energy Practitioners (NABCEP) certification, play a significant role in demonstrating expertise and installation quality. NABCEP-certified installers adhere to industry standards, which reduces the risk of system failure and enhances long-term performance. Homeowners have shared positive experiences, highlighting how skilled professionals have completed installations efficiently and experts have resolved unforeseen challenges effectively. Certified installers not only offer peace of mind but also contribute to maximizing the return on solar investments through meticulous craftsmanship.

Aesthetic Impact on Home Design

Minimizing visual disruption with low-profile designs

Low-profile solar mounting systems are rapidly gaining popularity due to their ability to harmonize with various architectural styles while minimizing visual disruption. These systems are designed to sit closer to the roof, offering a sleeker appearance compared to traditional mounts. For example, some low-profile designs blend seamlessly with both traditional and modern homes, maintaining aesthetic charm without compromising energy efficiency. Not only do they offer aesthetic advantages, but they also provide functional benefits such as enhanced wind resistance, ensuring stability and durability in various weather conditions.

Color-matching and architectural integration

Color-matching between solar panels and mounting systems significantly enhances the curb appeal of homes. By choosing modules that align with the color palette of the roof, homeowners can ensure that their solar installations do not stand out against the style of the house. Experts have highlighted the importance of architectural integration, suggesting that it maintains the unified design language of the home. Modern design trends are increasingly favoring solar installations that complement the existing architecture, resulting in both an eco-friendly and visually appealing enhancement to properties.

Balancing functionality with curb appeal

To achieve the perfect blend of functionality and curb appeal in solar roof mounting systems, homeowners should strive for installations that fulfill both energy and aesthetic goals. Selecting the right system involves considering factors such as the roof's angle, color scheme, and overall architectural style. By doing so, they can ensure that solar panels not only meet energy needs but also enhance the property's value. Case studies reveal that successfully integrated solar systems can significantly boost home value, demonstrating that it is possible to balance energy performance with captivating design elements.

Warranty and Support

A comprehensive warranty plays a pivotal role in the decision-making process for solar roof mounting systems. It provides assurance on the product's durability, performance, and the quality of installation. Customers should look for warranties that cover different aspects such as the product itself, the energy performance over time, and labor warranties, which ensure coverage for installation or repair-related issues. These warranties not only safeguard against potential defects but also contribute significantly to the overall value and reliability of the solar investment.

Solid customer support from the manufacturer is equally crucial. Numerous customer reviews highlight how responsive and competent customer support teams can notably influence long-term satisfaction with solar mounting systems. Effective customer support not only helps in resolving technical issues swiftly but also provides guidance throughout the installation and maintenance process. This ensures that any concerns are addressed promptly, thereby enhancing customer experience and trust in the product quality. Hence, strong warranties paired with reliable customer support build confidence in purchasing decisions and are essential for ensuring long-term value.

FAQs

Why is choosing the right solar roof mounting system important?

Choosing the correct solar roof mounting system is vital for maximizing solar panel efficiency, ensuring roof longevity, and providing long-term financial and environmental benefits.

What should be considered regarding roof materials for solar installation?

Each roof material, such as asphalt, tile, or metal, has unique characteristics requiring specific installation approaches to ensure effective solar energy capture and roof integrity.

How do I ensure my solar installation can handle environmental conditions?

Select materials like stainless steel for enhanced weather resistance, adhere to local codes, and ensure the system is designed to withstand wind, snow, and seismic factors.

What are the benefits of using low-profile solar mounting systems?

Low-profile designs minimize visual disruption and improve curb appeal, aligning with architectural styles and often providing better wind resistance.

View More
What are the key factors to consider when choosing a Solar Inverter for a residential system?

01

Apr

What are the key factors to consider when choosing a Solar Inverter for a residential system?

Understanding Solar Inverter Types and Applications

String Inverters: Cost-Effective Solutions for Optimal Sunlight

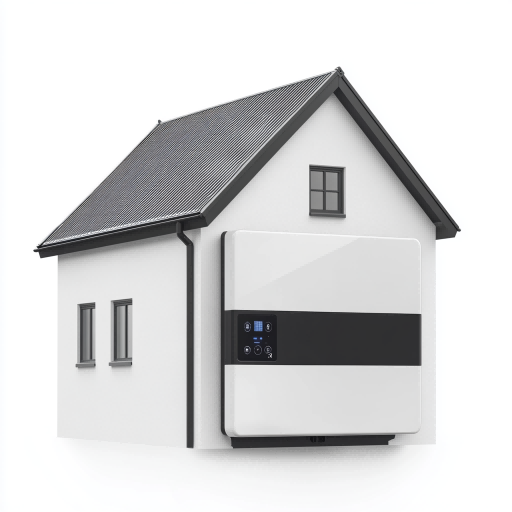
String inverters are among the most widely used inverter types, especially in residential solar systems, providing a cost-effective solution for homeowners who enjoy optimal sunlight conditions. These inverters convert direct current (DC) generated by solar panels into alternating current (AC), which is necessary for powering household appliances. Their effectiveness is maximized in situations where sunlight is abundant and shading is minimal, thus ensuring maximum efficiency and performance. String inverters are particularly suited for simpler and unshaded roof layouts, where solar panels can receive consistent sunlight throughout the day. By maintaining high efficiency in such conditions, string inverters prove to be an economical choice for many residential installations.

Microinverters: Maximizing Efficiency in Complex Roof Layouts

Microinverters offer a unique advantage by working with each solar panel individually, thereby enhancing energy harvest in installations with complex roof layouts. This feature is particularly beneficial in scenarios where shading occurs, as microinverters ensure that the performance of unshaded panels is not compromised. Installing microinverters can significantly improve overall system yield by maximizing energy output from each panel, regardless of its orientation or shading. Microinverters also provide precise monitoring capabilities, allowing homeowners to track the performance of individual panels and quickly identify issues for prompt resolution. These qualities make microinverters ideal for solar systems installed on roofs with varying angles, shading challenges, or unconventional designs.

Evaluating Efficiency Metrics and Performance

Peak vs. Weighted Efficiency: Key Differences

Understanding the differences between peak and weighted efficiency is critical when evaluating solar inverters. Peak efficiency refers to the maximum energy output an inverter can achieve under ideal conditions. While it offers a glimpse of potential performance, it often does not reflect daily operations where environmental factors like shading or temperature fluctuations are present. This contrasts with weighted efficiency, which considers real-world conditions. It accounts for variations in sunlight and temperature over time, making it a more reliable measure of actual performance. Homeowners selecting inverters should compare these efficiency metrics to determine the appropriate setup for their specific installation circumstances. This comparison ensures they get the best energy conversion rates tailored to their system’s unique conditions.

Impact of Shading and Temperature on Output

Shading is a significant factor in solar energy production, as it can greatly diminish the output of solar panels. This makes it crucial to understand how different inverters manage shading to maintain system performance. Additionally, high temperatures can negatively affect inverter performance, reducing both efficiency and longevity. The materials and technologies used in inverter production can mitigate these effects. Evaluating how inverters perform under varying environmental conditions is essential to ensure consistent, reliable performance throughout their lifespan. By choosing equipment that effectively manages shading and temperature fluctuations, users can optimize their energy systems, maintaining high levels of output and efficiency year-round.

Durability and Warranty Considerations

Weather Resistance for Harsh Climates

In regions with extreme weather conditions, selecting inverters with high weather resistance is crucial for maintaining the integrity and efficiency of solar energy systems. Look for inverters that come with certifications, such as IP (Ingress Protection) ratings, which indicate their ability to withstand environmental challenges like extreme temperatures, humidity, and storms. A well-rated inverter ensures minimal disruptions to energy conversion processes and reduces the likelihood of frequent maintenance, thereby safeguarding your investment in solar technology. By prioritizing durability, system longevity is enhanced, offering continuous energy supply even under severe climate conditions.

Interpreting Warranty Terms and Coverage

When investing in solar technology, understanding warranty terms and conditions is essential to ensure product reliability and confidence. Typically, longer warranty periods are indicative of the manufacturer's confidence in their product's durability and performance. It's important to examine what aspects the warranty covers—such as performance, parts, and labor—to fully comprehend the extent of protection offered. Reviewing customer testimonials and comparisons between different manufacturers can further illuminate the reliability and customer service standards. This informed approach will help users select a solar inverter with robust support, ensuring peace of mind and long-term satisfaction with the equipment.

Compatibility with Solar Panels and System Design

Matching Inverter Capacity to Panel Arrays

Choosing the correct inverter capacity is crucial for maximizing the efficiency of solar energy systems. Properly matching the inverter’s capacity with the power output of your solar panel arrays ensures optimal energy production. If your system is over-sized or under-sized, it can lead to inefficiencies that could impact overall performance and energy output. Factors such as the number of panels, their wattage, and expected energy generation rates should all be considered. By evaluating these elements, you can select an inverter that balances your system’s capacity with its energy production needs, ensuring effective and efficient operation.

Voltage Alignment for Seamless Integration

Voltage compatibility between solar panels and inverters is essential for efficient energy transfer and seamless integration. Ensuring that the inverter matches the voltage outputs of the panel array can help prevent potential equipment damage and ensure safe, effective operation. Consulting with an expert during the installation process can help avoid common pitfalls associated with voltage mismatches, such as energy loss or damage to system components. Seamless voltage alignment enhances the overall efficiency of the solar energy system, promoting a stable and reliable energy supply.

Monitoring Capabilities and Smart Features

Real-Time Performance Tracking Tools

Modern inverters are increasingly equipped with sophisticated monitoring tools that provide real-time data on energy production. These tools empower users to track their solar system's performance and make necessary adjustments to enhance efficiency. By examining the performance reports, homeowners can identify and address any inefficiencies, ensuring optimal energy generation. Additionally, the availability of mobile apps allows users to monitor their solar energy production remotely, adding convenience to their management processes. This capability is crucial for maximizing the benefit derived from solar systems and ensuring seamless operation.

Integration with Home Energy Management Systems

Smart inverters offer advanced compatibility with home energy management systems, facilitating better energy usage and heightened automation. Through this integration, homeowners can make informed decisions regarding their electricity consumption, ultimately reducing costs. By managing their solar energy system alongside other energy-dependent devices, users can significantly improve overall household efficiency. This interoperability not only enhances the user's ability to track and control energy usage but also contributes to optimizing power distribution across various appliances. Employing a smart inverter system represents a forward-thinking approach to energy management, offering both economic and operational benefits.

Balancing Budget and Long-Term Value

Upfront Costs vs. Lifetime Energy Savings

When considering solar technology investments, upfront costs can be daunting; however, opting for a high-quality inverter can significantly lower expenses in the long run. By reducing electricity bills, the initial investment may be offset over time. Calculating the payback period helps consumers determine how long it will take for energy savings to cover the inverter's cost, offering a clearer picture of long-term savings. It's also essential to consider maintenance costs alongside energy savings for a comprehensive understanding of the inverter's true lifetime value. This approach helps ensure that buyers make informed decisions that balance initial expenditure with sustainable savings.

Financing Options and Government Incentives

Exploring various financing options can help alleviate the initial burden of purchasing a solar system. Available federal and state incentives significantly reduce costs, making solar an attractive investment. For those considering a solar carport, for example, understanding and utilizing these incentives can make solar energy more accessible and affordable. Staying updated on new programs and grants offers opportunities to enhance financial efficiency. By maximizing these resources, consumers can enjoy the financial benefits of going solar without the stress of substantial upfront costs. Such strategic financial planning ultimately enhances the affordability and attractiveness of solar investments.

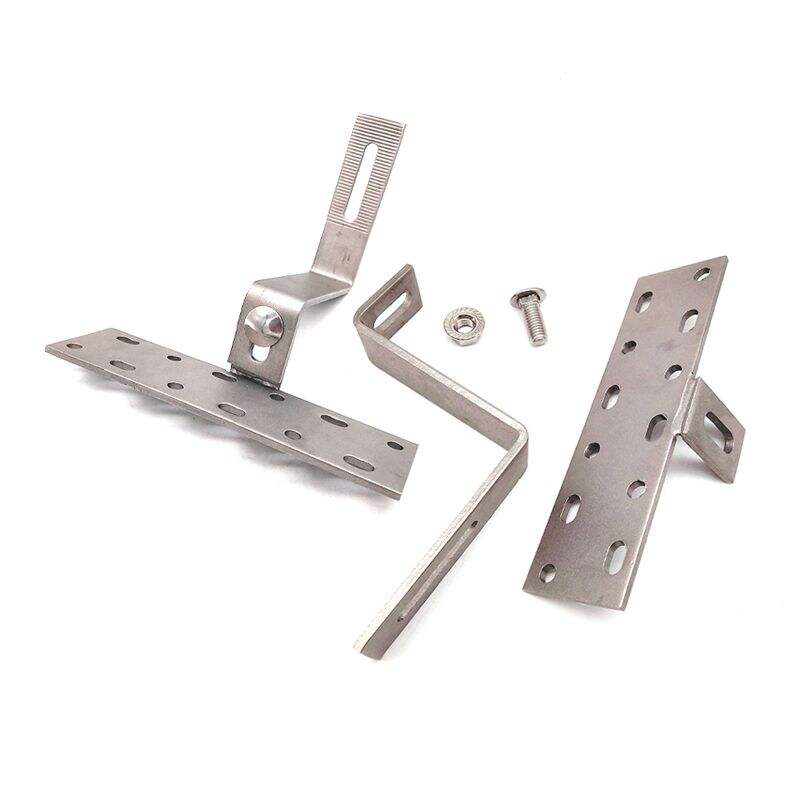
Installation Considerations for Mounting Systems

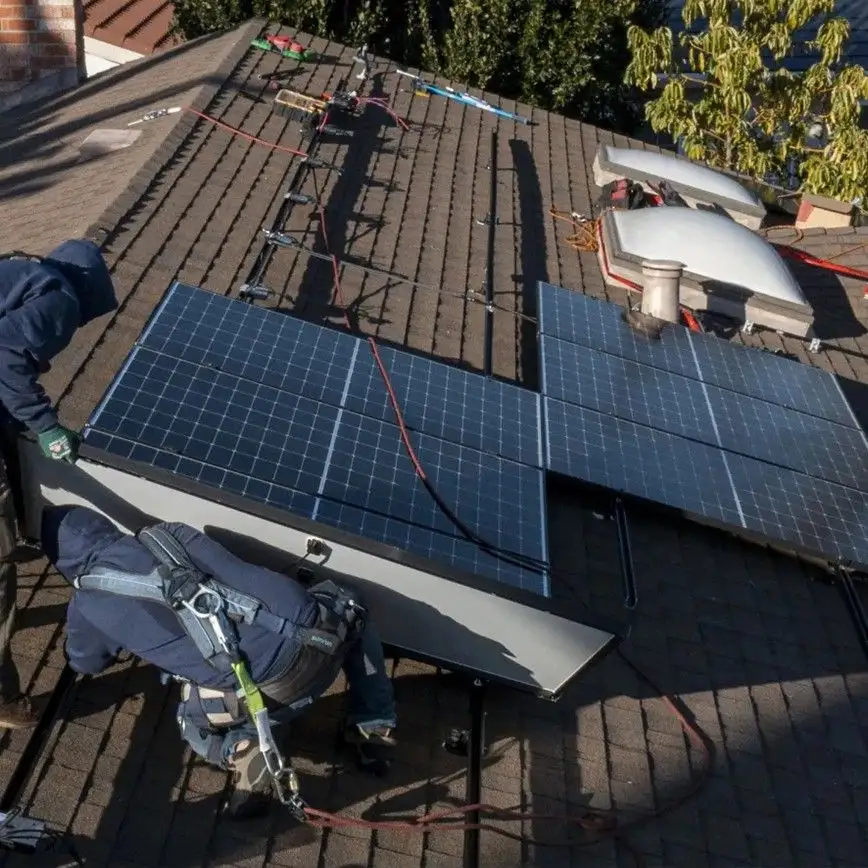
Roof vs. Ground Mounting: Space and Accessibility

When choosing between roof and ground mounting systems for solar panels, space and accessibility are primary considerations. Roof-mounted systems save valuable ground space and can be ideal for properties with limited land. However, depending on the design of the building, maintaining roof-mounted systems can be challenging, as accessibility might be restricted. On the other hand, ground mounts provide easier access for ongoing maintenance and often allow for the installation of a larger array, potentially yielding greater energy output. Nonetheless, they do require a significant amount of land, making them less feasible in urban environments.

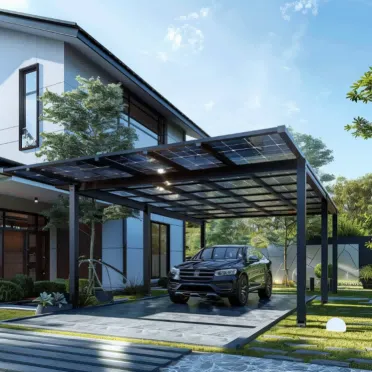
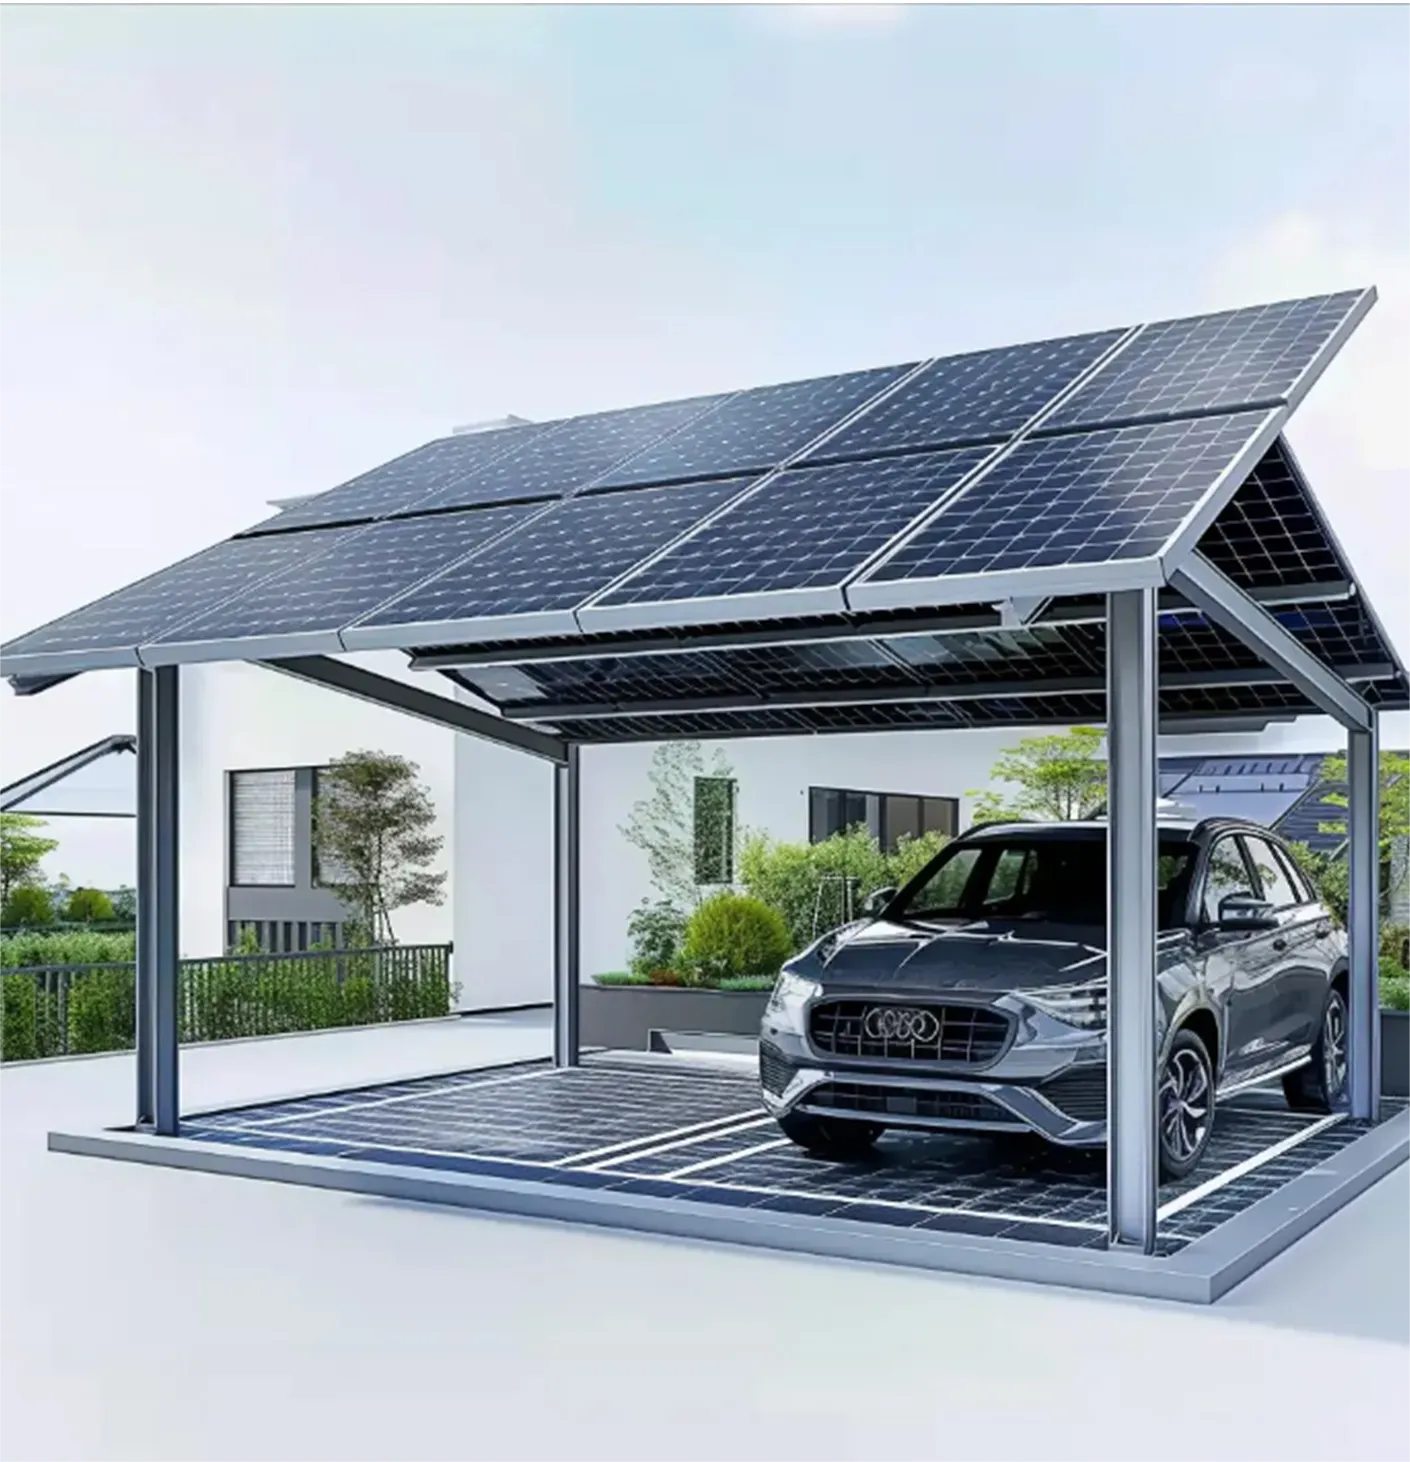
Solar Carport Kits: Addressing Shading Challenges

Solar carport kits present an innovative solution to shading challenges, offering dual benefits: shelter and energy generation. These kits are particularly beneficial in urban settings, where rooftop space is limited, providing a practical alternative for solar installations. They allow property owners to utilize parking areas for solar energy generation, efficiently addressing space constraints. Moreover, evaluating the structural integrity and energy output of such carport solutions is essential to ensure they meet desired performance and safety standards. The ability to maximize urban areas for solar setups aligns with sustainable urban development goals, making solar carports increasingly popular.

FAQ

What are string inverters?

String inverters are cost-effective inverter types used in residential solar systems that convert DC generated by solar panels into AC for household appliances.

How do microinverters work?

Microinverters work with each solar panel individually, maximizing energy harvest and providing precise monitoring capabilities, especially in complex and shaded roof layouts.

What is peak efficiency?

Peak efficiency refers to the maximum energy output an inverter can achieve under ideal conditions, not necessarily reflecting daily operational conditions.

Why is weather resistance important for solar inverters?

Weather resistance is crucial to ensure the inverter withstands environmental challenges, maintaining system integrity and efficiency in harsh climates.

How can I optimize my solar panel system's efficiency?

Optimizing efficiency involves matching inverter capacity with panel arrays, ensuring voltage alignment, and using real-time tracking tools.

View More

Get a Free Quote

Our representative will contact you soon.
Email
Name
Company Name
Message
0/1000

pv mid clamp

Advanced Grounding Technology

Advanced Grounding Technology

The PV mid clamp's integrated grounding technology represents a significant advancement in solar panel installation efficiency and safety. This innovative feature eliminates the traditional requirement for separate grounding components, streamlining the installation process while maintaining optimal electrical safety standards. The clamp achieves this through specially designed serrated teeth that penetrate the anodized layer of the module frames, creating a reliable electrical connection. This automatic grounding capability ensures consistent electrical continuity throughout the entire solar array, reducing the risk of electrical faults and improving overall system safety. The technology has been extensively tested to meet UL 2703 requirements for electrical bonding and grounding, providing installers and end-users with peace of mind regarding system safety and compliance.
Universal Compatibility System

Universal Compatibility System

The universal compatibility system of the PV mid clamp represents a breakthrough in mounting hardware versatility. This system features an innovative adjustable mechanism that accommodates solar panel frames ranging from 30mm to 40mm in thickness, eliminating the need for multiple clamp sizes in inventory. The design incorporates a sliding adjustment feature that maintains optimal clamping pressure regardless of frame thickness variations. This universal approach significantly simplifies the ordering process, reduces inventory management complexity, and ensures compatibility with virtually all major solar panel manufacturers. The system also includes adaptive rail fitting components, making it suitable for various mounting rail profiles and installation configurations.
Quick Installation Mechanism

Quick Installation Mechanism

The quick installation mechanism of the PV mid clamp revolutionizes the solar panel mounting process through its innovative snap-in design. This feature enables installers to secure panels with a simple click, significantly reducing installation time and labor costs. The pre-assembled structure eliminates the need for loose components, minimizing the risk of parts being lost or incorrectly assembled on-site. The mechanism incorporates an audible click feedback system that confirms proper engagement, ensuring reliable installation every time. Additionally, the design allows for single-handed operation, improving worker safety and efficiency, particularly during roof-mounted installations where mobility and balance are crucial considerations.